Importing Data into Brunchie
Bring your guest lists, seating charts, itineraries, and event data into Brunchie from any spreadsheet, PDF, Word doc, or photo — one place for everything
Feature overview
Brunchie is designed to be the single place you manage your event. If you already have data in spreadsheets, PDFs, or photos, you can import it directly — no retyping required.

What you can import
Seating charts
Upload a seating chart in any of these formats and Brunchie will create tables and assign guests automatically:
- PDF — Floor plans, venue diagrams, or exported layouts. AI reads the document and extracts tables, positions, dance floors, stages, and other venue items.
- Photos (PNG, JPG, JPEG) — Snap a photo of a hand-drawn seating chart, whiteboard layout, or printed diagram. AI extracts the structure.
- Spreadsheets (CSV, XLSX, XLS, XLSM, ODS) — Guest lists with table names, emails, and seat numbers. Columns are auto-detected.
Guest lists
Brunchie is free; switching over takes 30 seconds. The four ways guests come in, in order of "least typing":
- Upload a file — the Upload file tab in the invite modal takes a Zola or The Knot export, a Google Sheet (CSV / XLSX), a screenshot of a printed list, a vendor PDF, or a photo of a hand-typed page. Brunchie reads it, you confirm the parsed rows on a review screen, then click Send invites to N to email everyone in one click. Names + emails only — table assignments come later.
- Paste a list — names separated by commas, newlines, or tabs. Copy a column straight from a Google Sheet, paste an email signature block, dump a notes-app list. Each line becomes one guest on the People tab.
- Type names directly — for the +1s your client mentions on the call, the relatives without email, the coworkers being added one by one. Use the Add by name tab in the invite modal.
- Send sign-in emails to known emails — the Invite by email tab takes a list of emails (paste-friendly), sends each guest a one-click sign-in, and lets you promote any of them to Cohost from the People tab afterward.
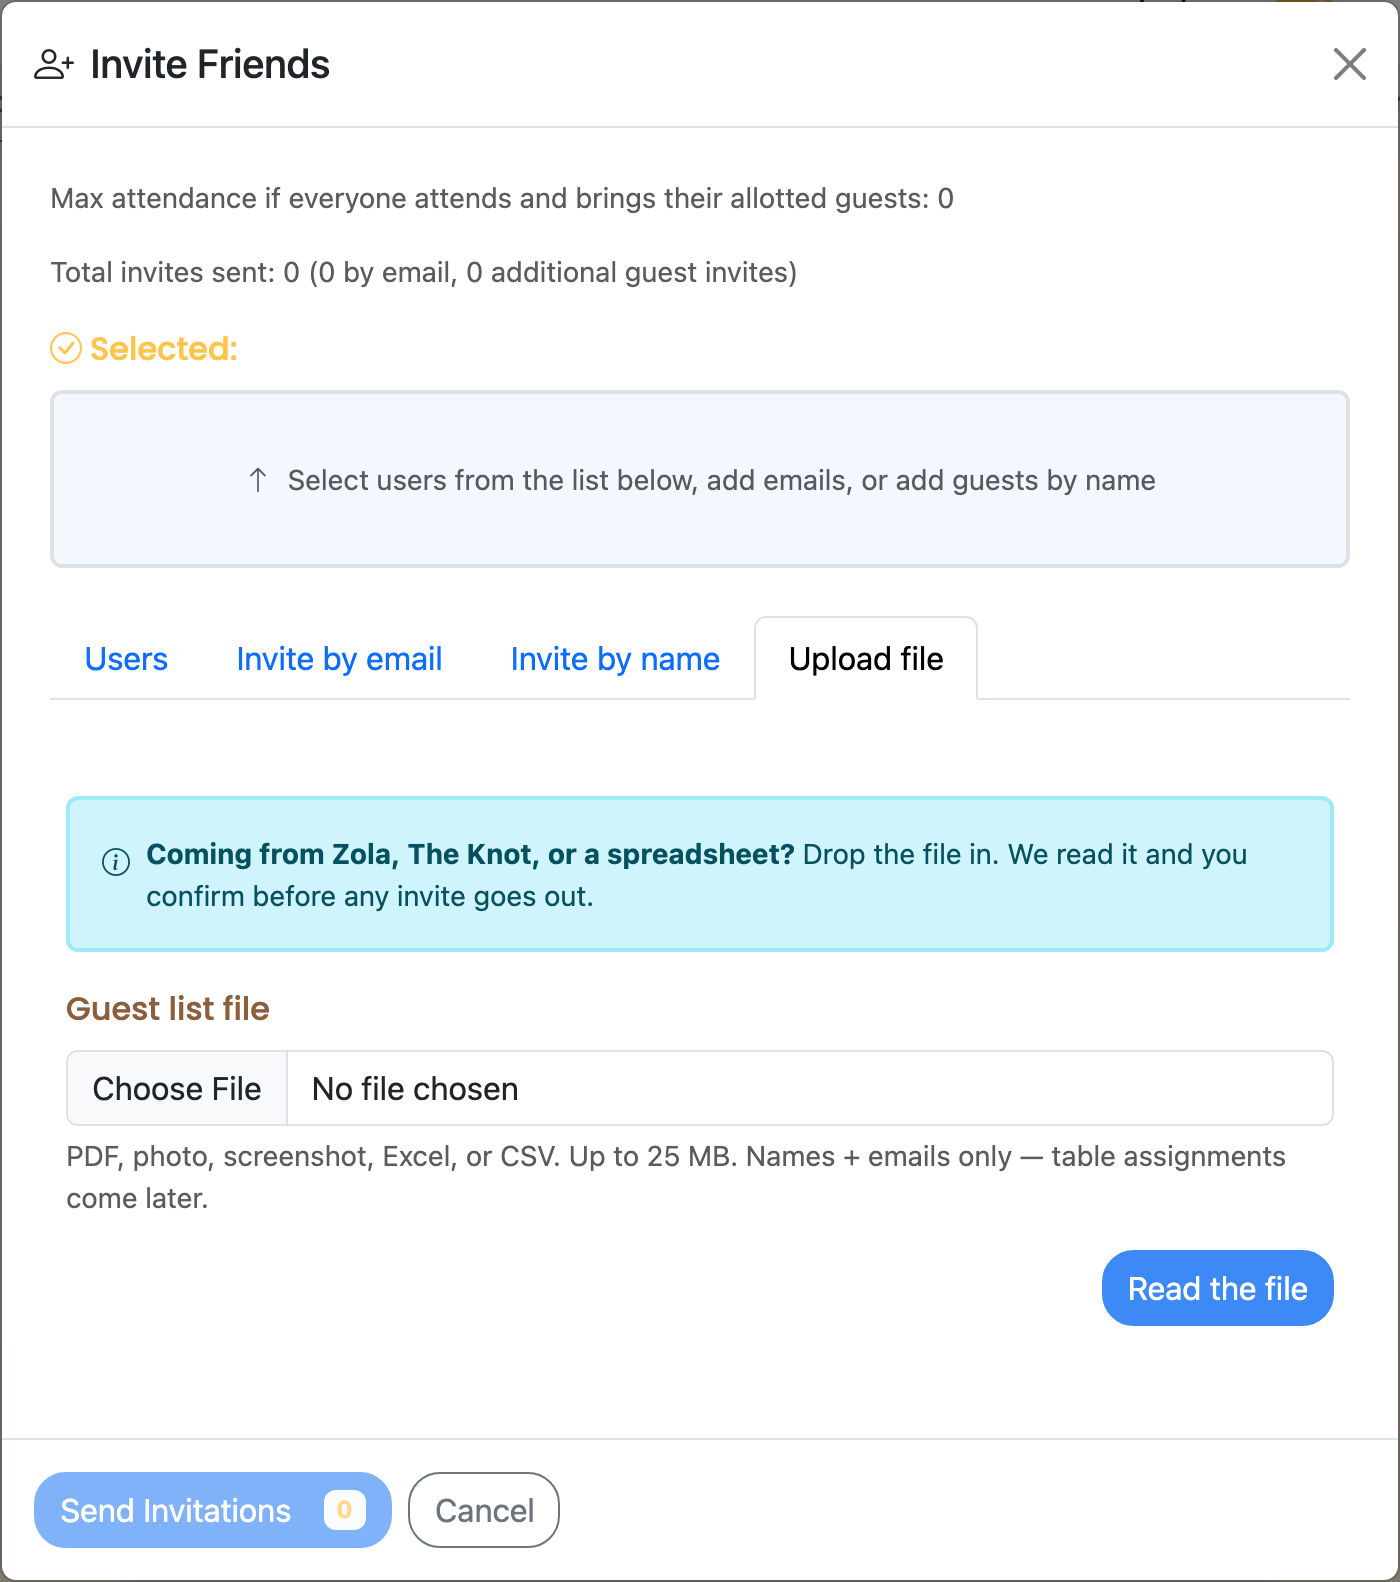
What the upload tab handles
- CSV / Excel —
.csv,.xlsx,.xls,.xlsm,.ods. First sheet only; columns are auto-detected by header (Name / Email) and content shape. - PDF — exports from Zola, The Knot, vendor planners, or a print-to-PDF of any spreadsheet.
- Image — PNG, JPG, JPEG, HEIC, WebP, GIF. Phone photo of a printed list, screenshot of a Google Sheet, scan of a clipboard sign-up.
- Up to 25 MB per file.
Every parsed row lands on a review screen with confidence scores. Low-confidence rows highlight in amber so you can fix typos or bad OCR before any invite goes out — nothing emails until you click Send invites to N.
Itineraries
Already have a schedule built somewhere else? Bring it in instead of retyping every row:
- Word docs (DOCX) — a planner's day-of timeline or run-of-show written up in Word.
- PDF — an exported agenda, a vendor's printed schedule, or a print-to-PDF of any timeline.
- Photos (PNG, JPG, JPEG) — snap a picture of a printed itinerary or a whiteboard timeline.
- Spreadsheets (CSV, XLSX, XLS) — a schedule you've been keeping in Google Sheets or Excel.
Brunchie's AI reads the file and shows you a preview of every item it picked up — time, title, location — so you can check it before anything goes live. Up to 25 MB per file.
Expenses
Add expenses manually or import receipts. Brunchie tracks who paid what and calculates settle-up amounts.
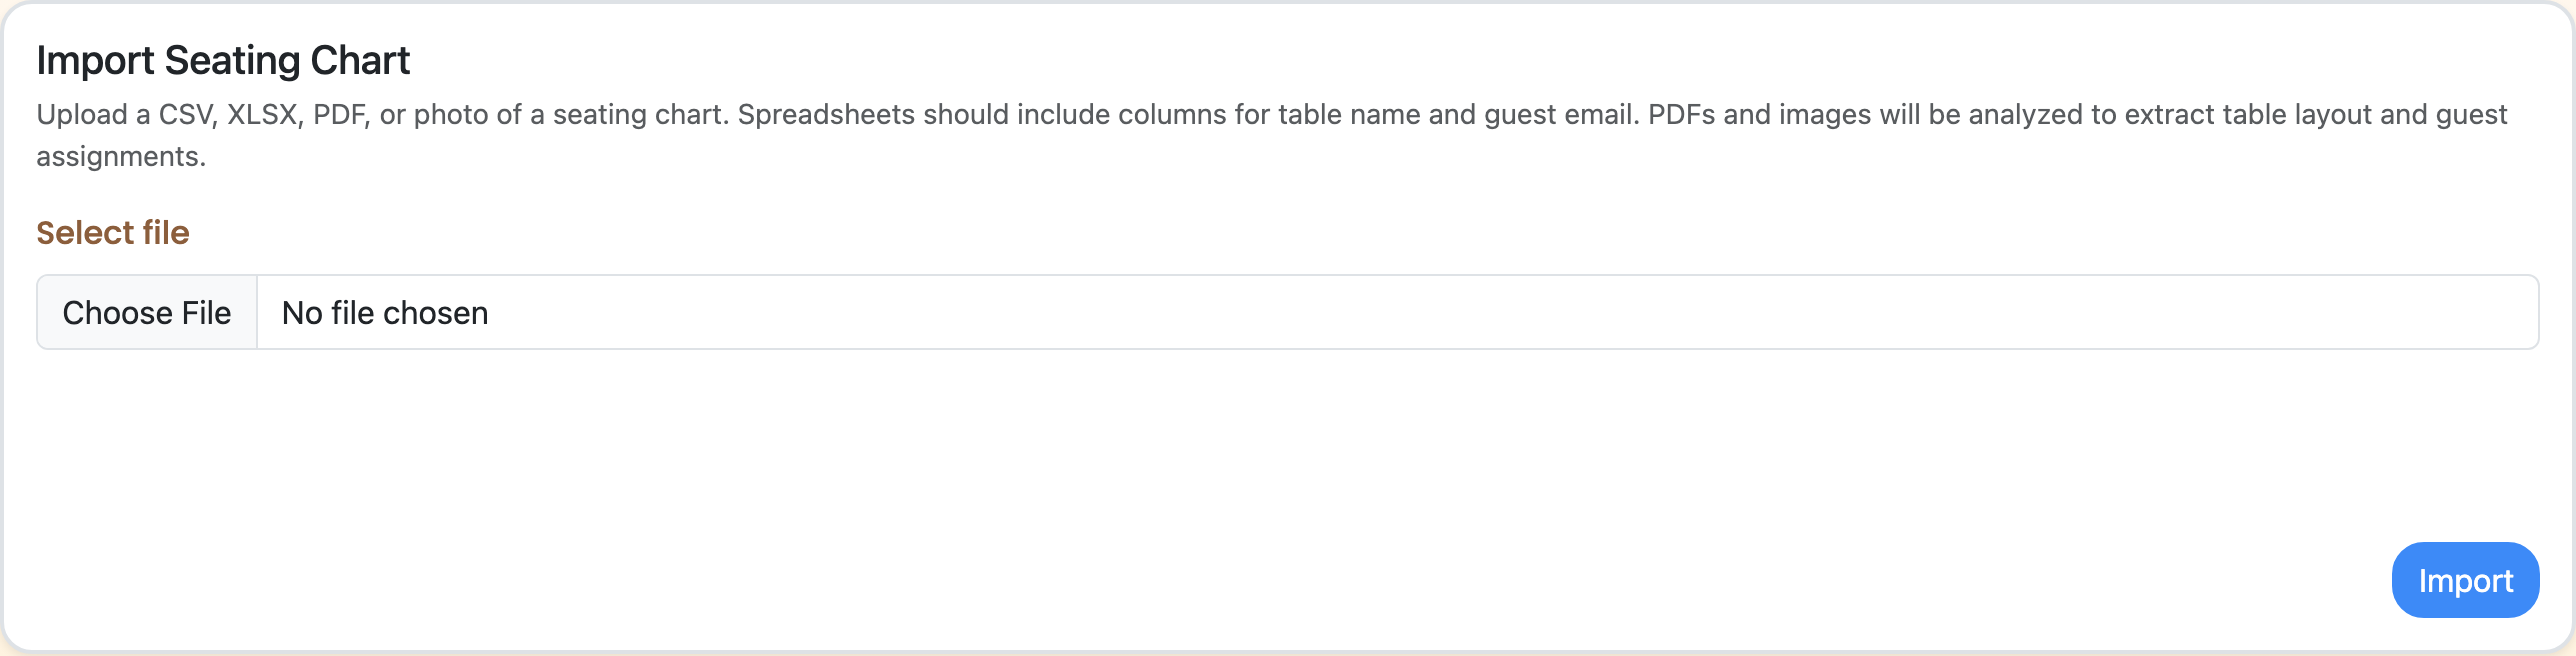
How to import a seating chart
- Open your hangout's seating chart and open it to edit.
- Scroll to the Import Seating Chart section on the edit page.
- Choose your file (PDF, photo, or spreadsheet).
- For spreadsheets: tables and guest assignments are created instantly.
- For PDFs and photos: AI processes the layout in the background (30–60 seconds). A status banner appears above the chart while it works.
- Once complete, your imported tables appear on the canvas — drag to reposition, then use auto-assign to fill any remaining seats.
How to import an itinerary
- Open the Itinerary manager from your hangout page.
- Hit Import file.
- Choose your file — a Word doc, PDF, photo, or spreadsheet (up to 25 MB).
- Brunchie's AI reads it in the background and shows a preview of every item it picked up — time, title, location, and notes.
- Review the parsed rows, fix anything that needs a tweak, then confirm.
Importing an itinerary replaces the items in that itinerary with the ones from your file — but nothing changes until you confirm, and the preview shows you exactly what will go live first. Importing only affects the one itinerary you're working in, so a host-only "vendor runbook" stays untouched when you import your guest-facing schedule. Only hosts and cohosts can import.

Tips for best results
- PDFs: Use the highest resolution available. Exports from planning tools work great. Screenshots are OK but may lose detail.
- Photos: Good lighting and a straight-on angle give the best results. Avoid glare and shadows.
- Spreadsheets: Include clear column headers ("Table", "Name", "Email"). The more columns you include, the more Brunchie can auto-detect.
- Guest matching: Imported guests are matched to your attendee list by email address. Make sure emails match between your import file and your guest list.
- Additive seating import: Importing a seating chart adds to your existing chart — it won't delete tables you've already created. (Itinerary import works differently — it replaces the items in that one itinerary once you confirm.)
One place for everything
The goal is simple: bring everything into Brunchie so you're not switching between apps. Your seating chart, guest list, expenses, polls, and itinerary all live in one hangout. Import what you have, build what you need, and share one link with everyone involved.
Related guides
- Seating Charts — detailed seating chart setup, preferences, and auto-assign
- Itinerary & Schedule — build, share, and import day-by-day schedules
- Group Trip Planning — paste a list of trip-mates and start coordinating
- Wedding Planning — where seating-chart import fits into the wedding workflow
- Expense Splitting — track costs alongside your guest list
{{demo_preview:seatings}}
Try Brunchie free
Brunchie replaces the spreadsheet, the group chat, and the half-finished invite list. Free forever for the people we built it for.
Get started